

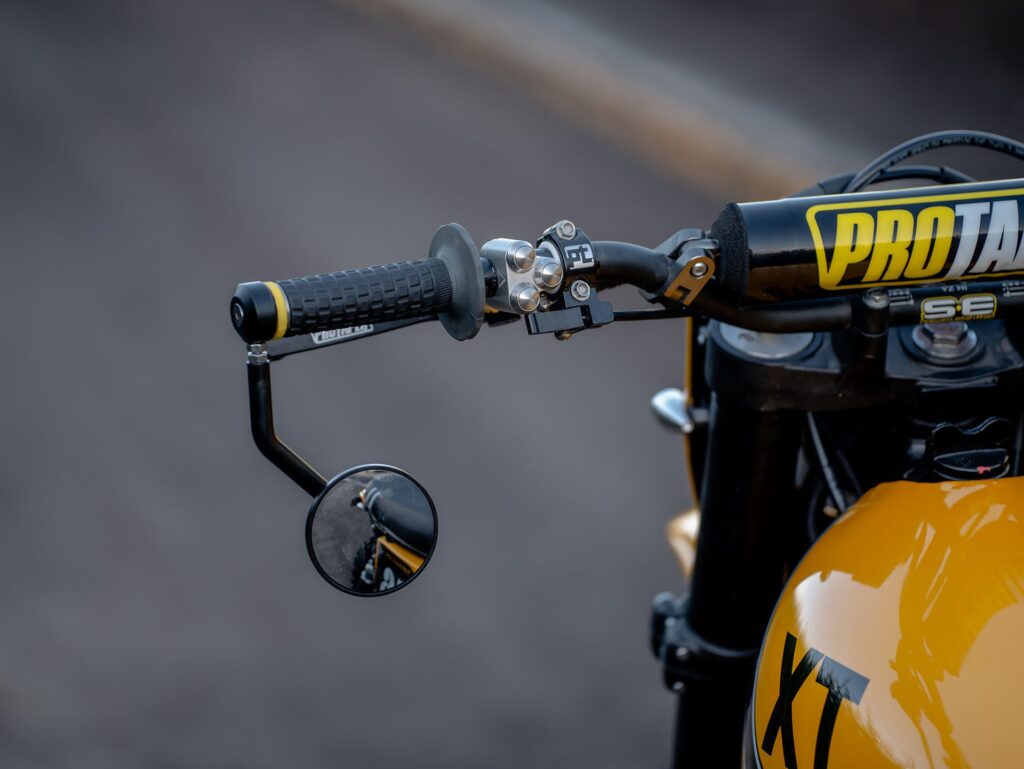
Handlebar switches are one of those parts most riders never think about until they start building something custom. Stock switch clusters do the job on a factory bike, but the moment you start swapping bars, cleaning up the cockpit, or wiring in a new ignition system, those bulky OEM blocks start feeling like an eyesore.
If you’re planning a build, or just want to tidy up an existing bike, choosing the right switches makes a bigger difference than you’d expect. They shape how the bars look, how the wiring runs, and how confident you feel reaching for the horn at an intersection you’ve never seen before.
Why the stock switches usually have to go
Factory switch housings are designed for one thing: fitting the bike they came on. They’re often plastic, oversized, and full of buttons you’ll never use. Hazards, high-beam flash, mode toggles for a dash you’ve since removed.
There’s also the wiring problem. Stock harnesses tend to have thick looms with connectors sized for the original loom routing. Once you’ve relocated or ditched the airbox, put on a smaller battery, or rewired around a new ignition, the OEM plugs stop making sense. Aftermarket units let you start fresh with cleaner wire runs and only the functions you actually need.
What the switches actually need to control
Before you buy anything, get clear on what functions your bike needs at the bars. At minimum you’re looking at:
- Ignition or kill switch
- Starter button
- Turn signals
- High and low beam
- Horn
Some riders add extras like a hazard toggle, a mode button for aftermarket gauges, or a pass switch for flashing the high beam. Others go the opposite direction and delete anything they can legally get away with, running just the essentials for a stripped-back look.
If your build is street legal, check your local road rules before you delete anything. In most places, turn signals and a working horn aren’t optional, and a roadside inspection is a bad time to find out you’re short a switch.
Materials matter more than you’d think
A handlebar switch is a tiny piece of gear that lives in the worst possible conditions. It gets rained on, baked in the sun, and grabbed at every intersection. Cheap ones fail. Really cheap ones fail in a way that leaves you without a headlight on a dark road, which is the kind of problem you want to avoid.
Look for switches with a solid billet aluminum or stainless housing, sealed internals, and good tactile feedback. When you press a button, you should feel it click, not mush. Weatherproofing matters too. IP65 is a reasonable baseline for a road bike.
Pay attention to how the switch mounts to the bar. Clamps that use a properly machined saddle grip the bar without slipping. Ones that rely on a single set screw tend to work loose over time, especially on rougher surfaces.
Wiring is the part people underestimate
The switches themselves are only half the equation. How they wire into the rest of the bike is what makes or breaks the install.
Some aftermarket switches come pre-wired with color-coded leads and connectors, ready to plug into a modern loom. Others are just raw contacts, meant for someone building a complete custom harness. Neither approach is wrong, but they suit different projects.
If you’re not confident soldering and heat-shrinking joints, go with a switch designed to work with a plug-and-play loom. It saves hours, and it means you’re not troubleshooting a phantom short six months later. If you enjoy wiring work and you’re building the harness from scratch anyway, raw switches give you more freedom.
Grounding also deserves a mention. Cheap switches sometimes ground through the housing to the handlebar, which sounds fine until the bar gets powder coated and suddenly nothing works. A dedicated ground wire is always the safer bet.
Matching switches to the aesthetic of the bike
Function first, but looks matter on a custom build, and the switch clusters sit right in your eyeline every time you ride. A brat-style build with clip-ons and a bare frame looks weird with chunky black plastic housings. A modern retro with tubular bars can carry beefier switchgear without a problem.
Small, minimalist switch pods look great on stripped-down builds and cafe racers. Something like the Handlebar Switches by Purpose Built Moto shows how compact billet housings can clean up a cockpit without losing any of the functions you actually use. If you’re going for a rugged scrambler or ADV vibe, you can get away with larger, more aggressive-looking clusters.
Finish is another consideration. Black anodized, raw aluminum, and brushed stainless all age differently. Raw finishes develop patina fast, which some people love and others hate. Anodized black tends to fade if it lives in direct sun for years. Think about whether you want the bike to look showroom-fresh in five years or have some character.
A quick sanity check before you buy
Run through this list before you drop money on a set:
- Bar diameter. Standard bars are usually 22mm or 25.4mm at the grip area. Make sure the switch clamps fit yours.
- Switch functions. Count what you need. Buying a two-button unit and realizing you have nowhere for the horn is a bad afternoon.
- Compatibility with your ignition. Push-to-start switches need a compatible starter relay. Some bikes need a resistor added when you swap in low-current buttons.
- Handedness. Some switches are side-specific. Others are ambidextrous. Confirm before ordering.
- Warranty and replacement parts. A brand that sells replacement internals is one that expects their stuff to last. That’s a good sign.
Wrapping it up
Handlebar switches are a small upgrade with a disproportionate impact. They change how the bars look, how the cockpit feels under your hands, and how the whole electrical side of the bike comes together. Spending a little time picking the right set, and installing them properly, pays off every time you swing a leg over the bike.
Whatever direction you take your build, pick switches that match how you actually ride. Fancy features don’t help if the buttons feel wrong at speed. Simple, well-made, and correctly wired beats flashy every time.
